How to find your h-index on Google Scholar
Google Scholar is a search engine with a special focus on academic papers and patents. It’s limited in functionality compared to the major academic databases Scopus and Web of Science, but it is free, and you will easily know your way around because it is like doing a search on Google.
While Scopus and Web of Science limit their analyses to published journal articles, conference proceedings, and books, Google Scholar uses the entire internet as its source of data. As a result, the h-index reported by Google Scholar tends to be higher than the one found in the other databases.
How to calculate your h-index using Google Scholar
Google Scholar can automatically calculate your h-index; you just need to set up a profile first. By default, Google Scholar profiles are public – allowing others to find you and see your publications and h-index. However, if you don’t want to have such a public web presence, you can un-tick the “make my profile public” box on the final page of setting up your profile.
Once you have set up your profile, the h-index will be displayed in the upper right corner. Besides the classic h-index, Google also reports an i10-index along with the h-index. The i10-index is a simple measurement that shows how many of the author’s papers have 10 or more citations.
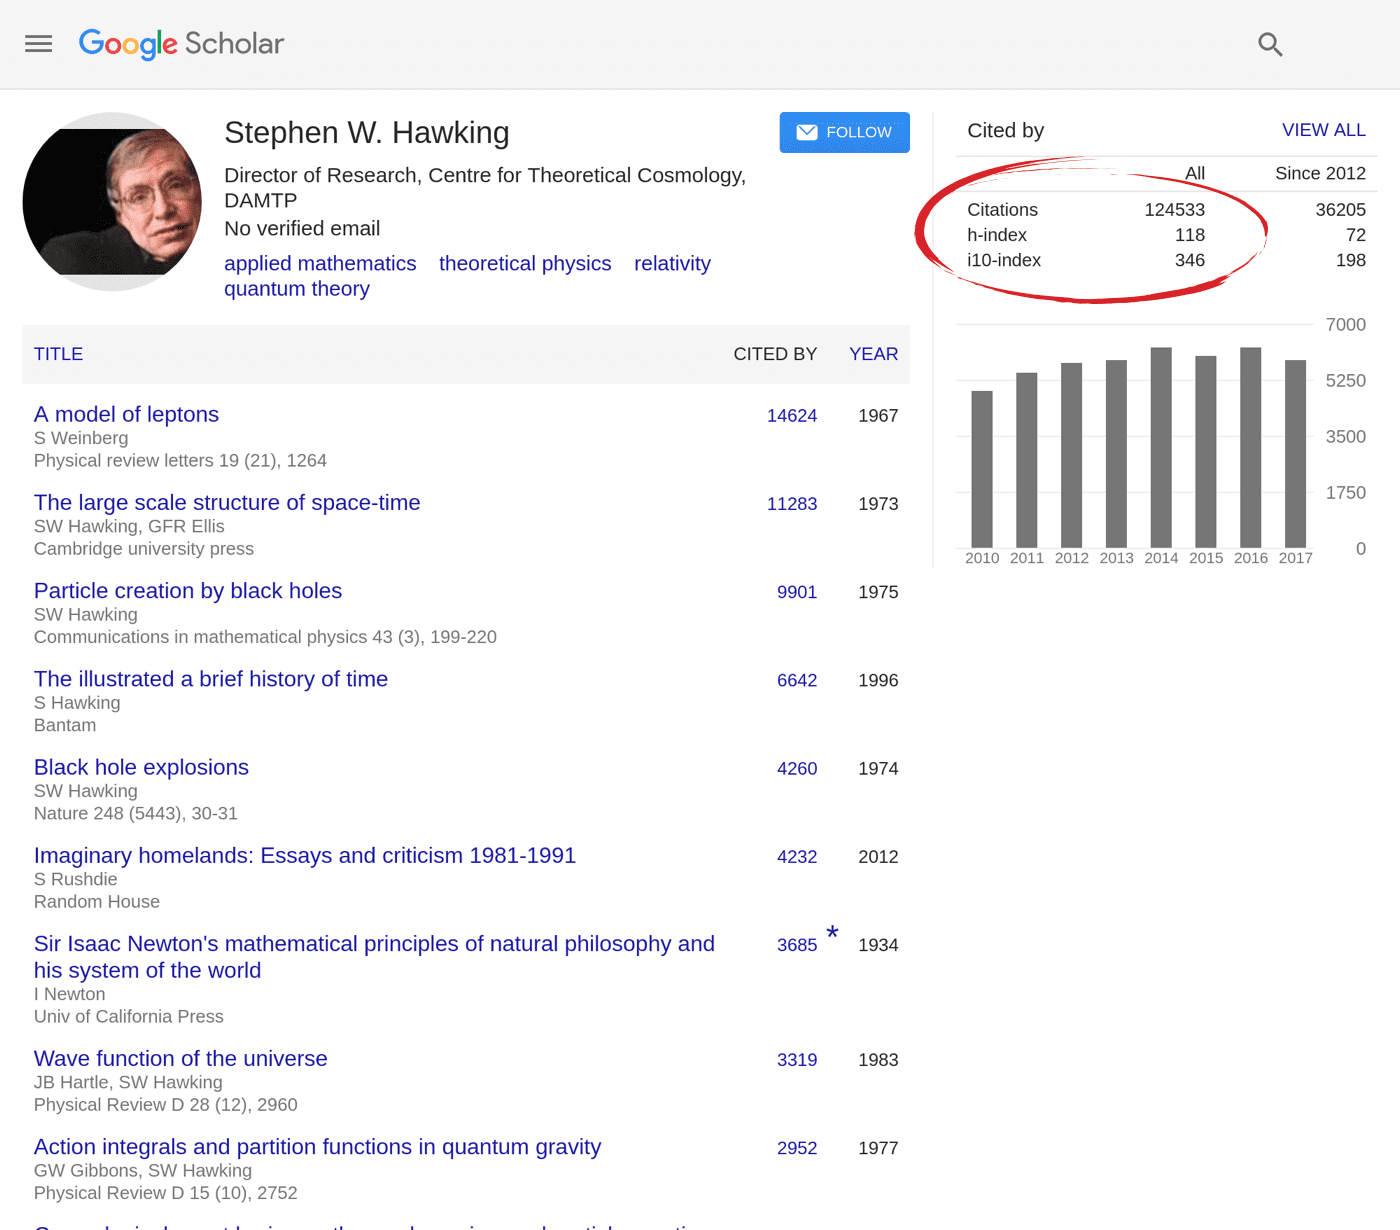
Google Scholar also has a special author search, where you can look up the author profiles of others. It will, however, only show results for scholars with public profiles, as well as those of historical scientists like Albert Einstein.
The name says it all: get more insights using Harzing’s “Publish or Perish”
Google Scholar’s extensive database might list publications that most academics would not include in an h-index analysis. So it might be useful to vet the papers before calculating the h-index. Scopus and Web of Science offer such functionality to some extent, but for Google Scholar it’s not possible to do right in your browser. However, there is a free desktop application called Publish or Perish, that allows you to just do that. It’s available on Windows, and with some effort, you can also run it on macOS and Linux.
In order to check an author’s h-index with Publish or Perish go to “Query > New Google Scholar Profile Query”. Enter the scholar’s name in the search box and click lookup. A window will open with potential matches. After selecting a scholar, the program will query Google Scholar for citation data and populate a list of papers, and present summary statistics on the right of this list. The list is particularly helpful because it can be used to exclude false positives.

In addition to the standard h-index, Publish or Perish, also calculates Egghe’s g-index, along with normalized and annual individual h-indexes. You can read more about how these are calculated in the Publish or Perish manual.